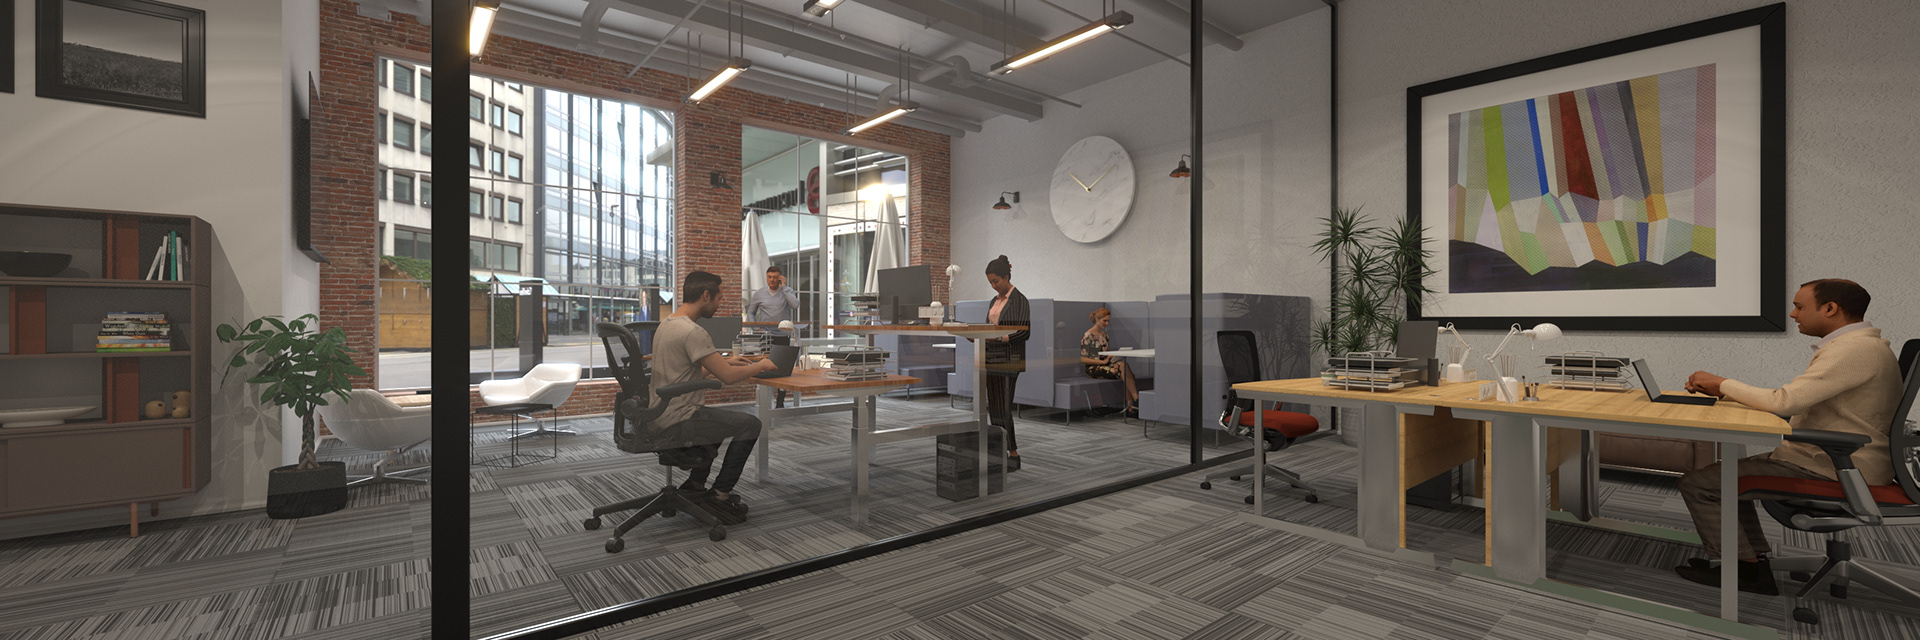
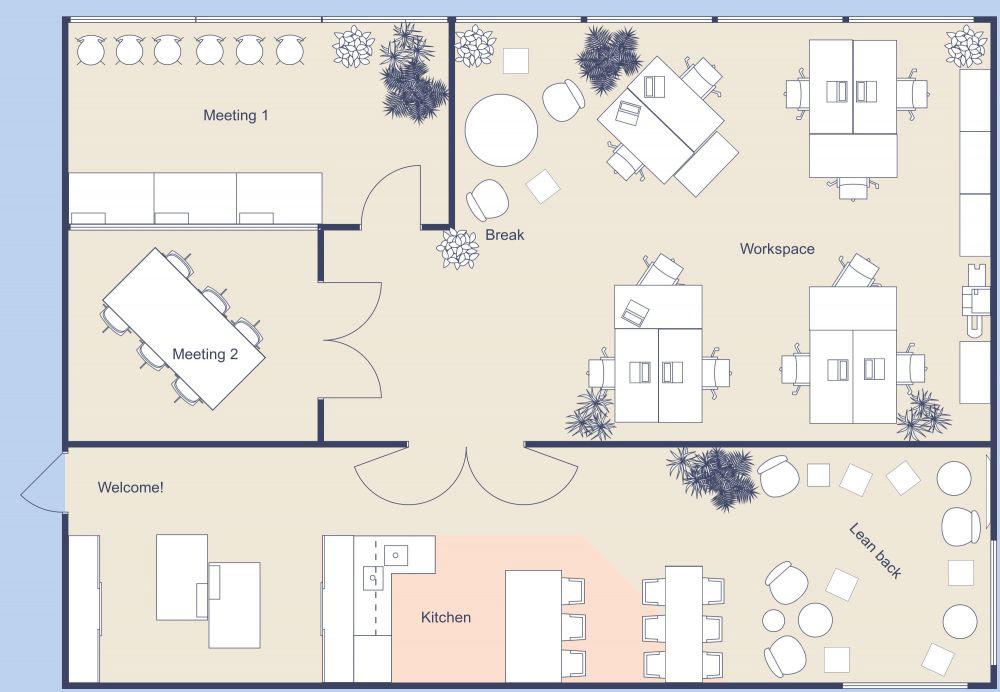
This is a step-by-step workflow of how I create and produce a realistic 3D render. For this example, I've decided to do a office. I don't have a CAD drawing, so I used a floor plan found online.
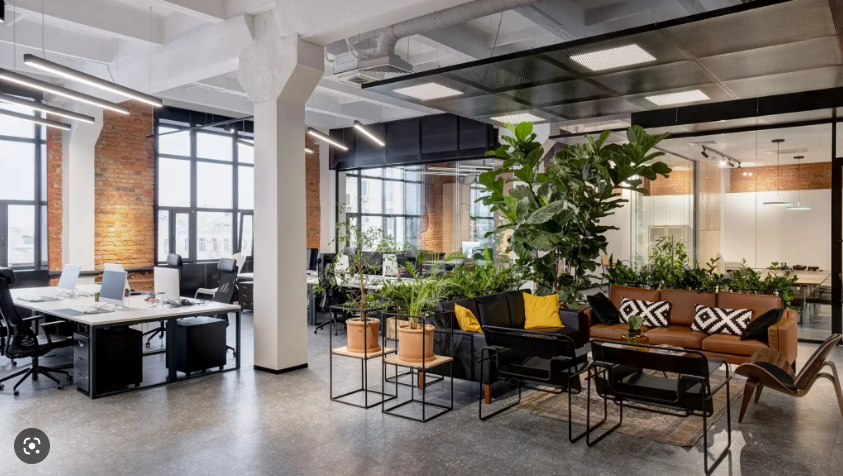
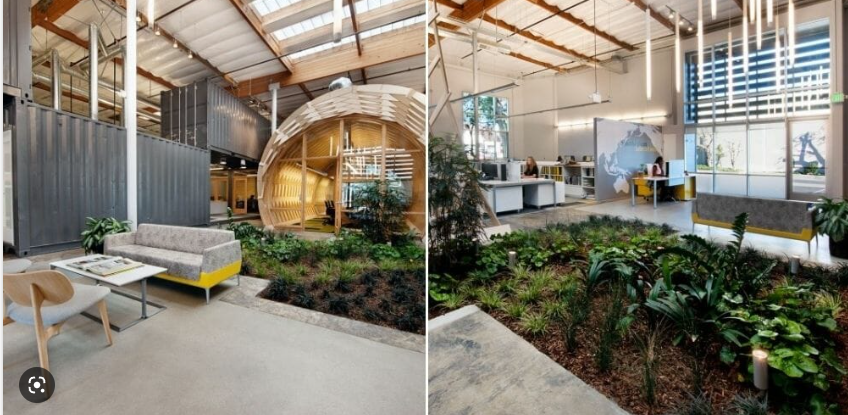
I started by deciding how I wanted my office, and how I wanted it lit. I decided on a modern office, with glass panels and bright lighting coming from windows and fluorescent lights.
Below are some references I found on this look and the lighting I'm after.

I have my floor plan set up, using millimeters as the unit scale, and using the right resolution when importing the plane to ensure all the proportions are correct. The plan I'm using doesn't have a scale bar so to make up for this I'm bringing in a basic table and matching it up to that. The floor plan chosen is quite large, so although I plan only to show off a part of it, I'll ensure to create the majority for lighting purposes.
I am using this floor plan as more of a guideline instead of sticking to it completely, as this isn't a client project.
The next step was to create the floor and walls. There are no elevations, so I'm going based on the average height of an office, which is about 14 feet (4.27 meters).
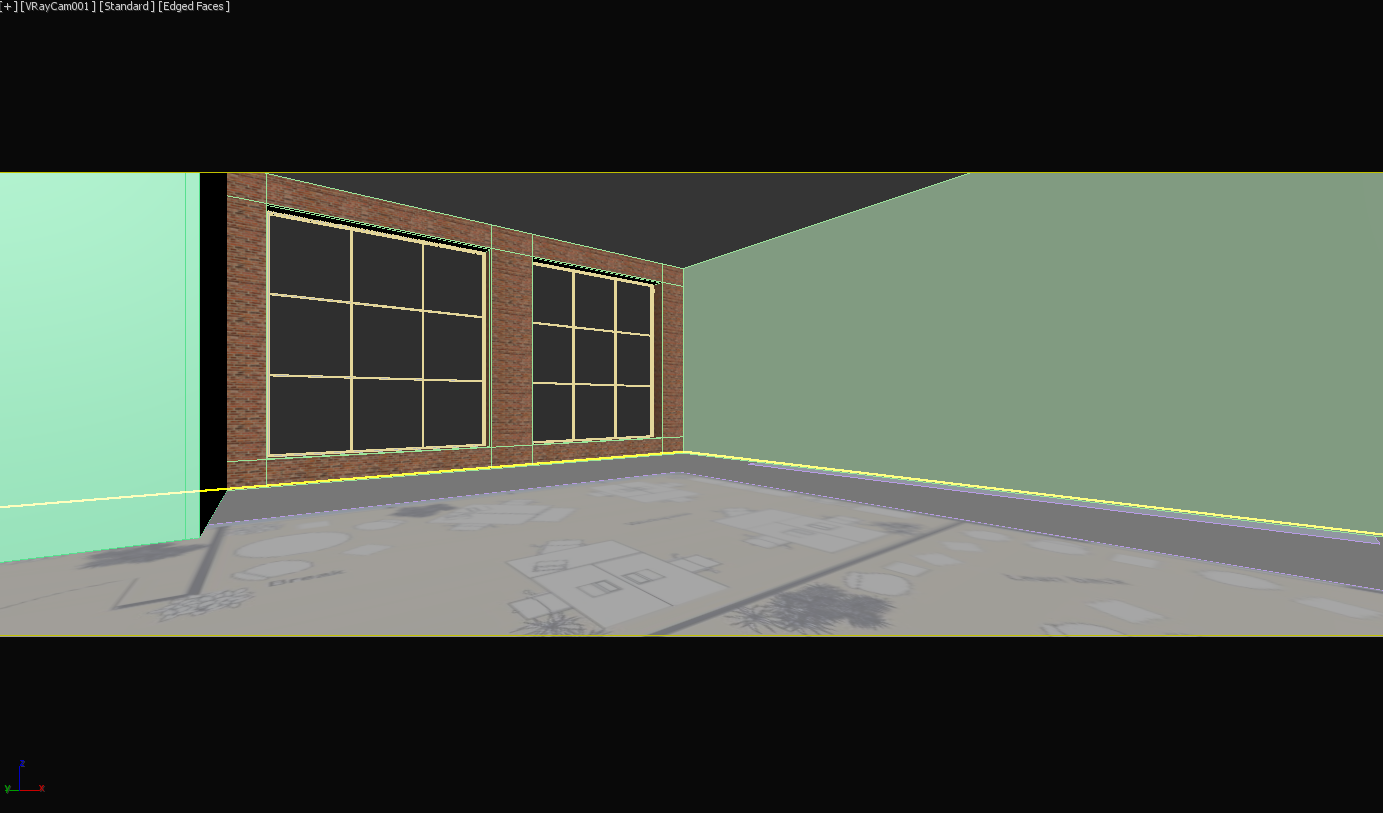
From there the windows have been created, as well as the camera position and the testing render settings set up.
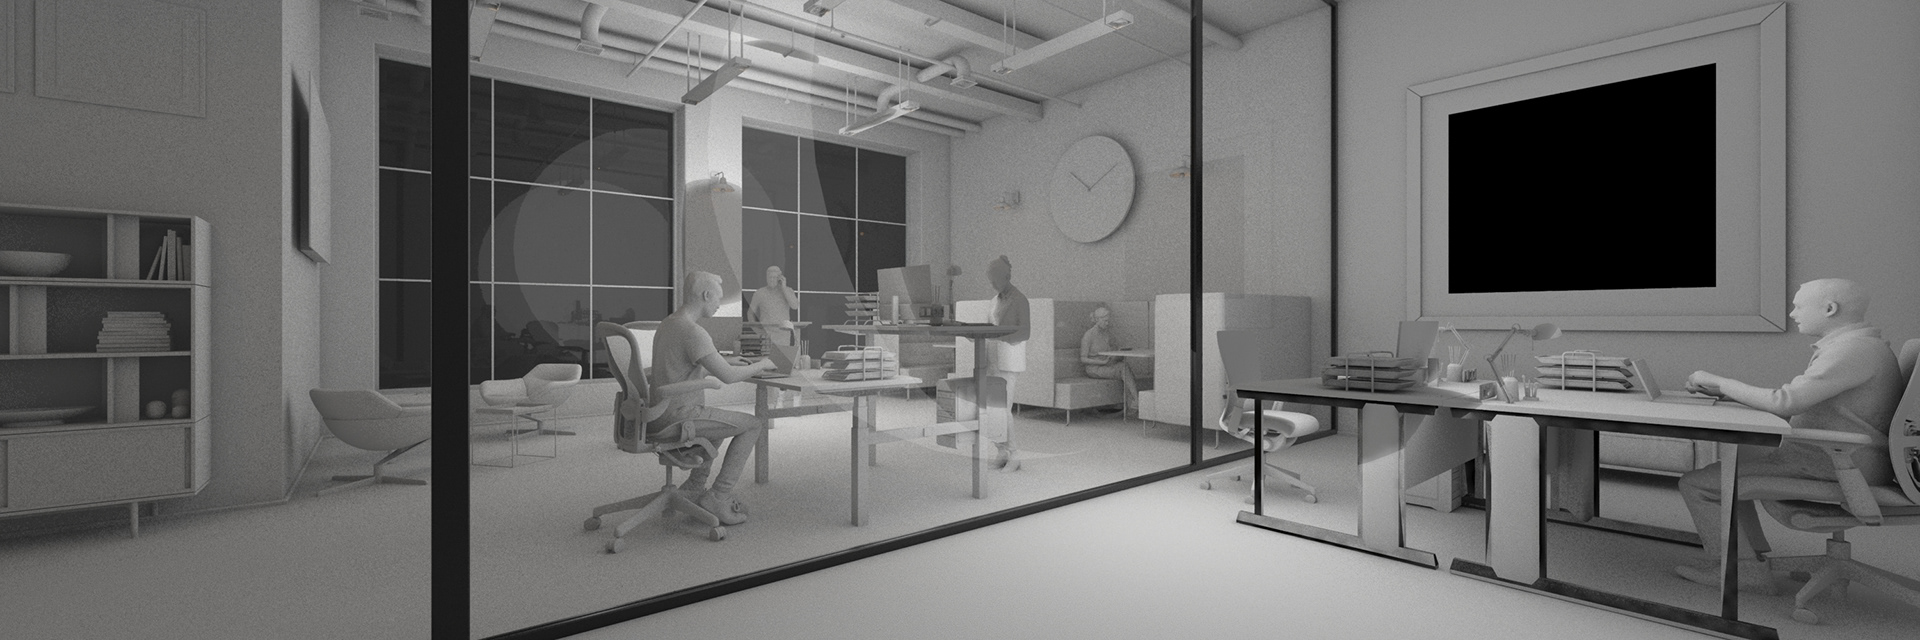
Next was to bring in the meshes. This was a mix of finding them online, using Chaos Content Browser, and creating them myself. I attached two large spheres for light and did a chalk render of the outcome so far. Normally, this is where I would get a sign-off from the client that they are happy with the layout and models used.
Next was to move on to the lighting. I'm planning on using the LEDs from the lights with IES lights and HDRI for the outside. I'm also planning to use lights at the windows
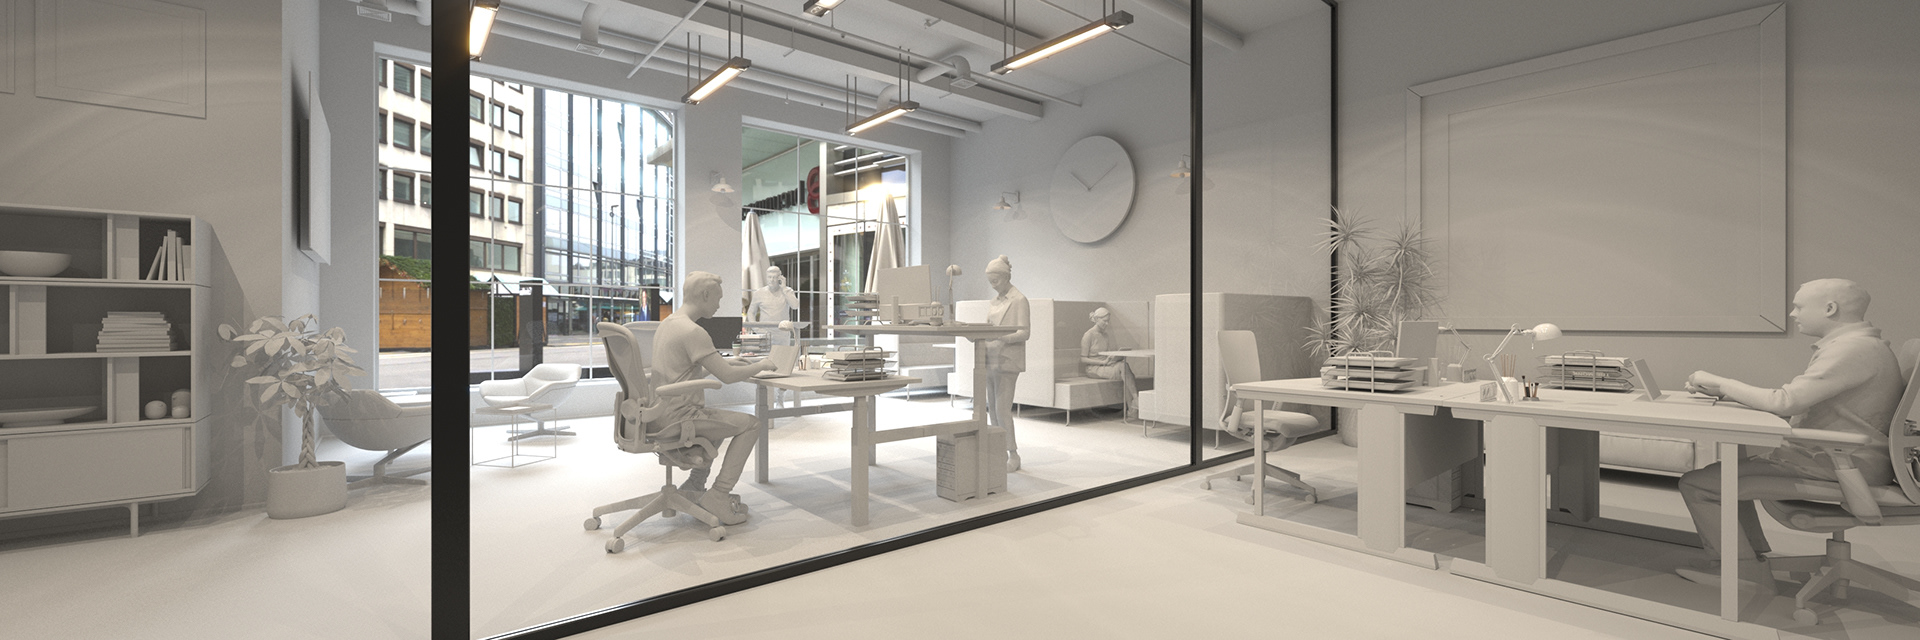
Once the lighting has been approved, the materials get applied and the final render is created.